Posemesh with React Native
This is a minimal iOS project showing how a Unity AR app that uses the posemesh can be embedded in a React Native app. Download it from Github.
The project was created with Expo by following this tutorial. For embedding Unity as a library into a React Native project, we use @azesmway/react-native-unity. For the posemesh-enabled AR app, we use a slightly modified version of the Simple persistant AR experience tutorial where the "Place Cube" button is rendered in React Native instead of Unity.
Project structure
app
Expo router uses this folder to structure the pages in a way that is similar to a website.
index.js is the initial react-native view that displays an instruction text and a button to open the AR view.
Clicking that button opens the unity.js view that shows a button to place cubes in AR. It uses /providers/unityprovider to subscribe to and post messages to Unity. When the posemesh SDK in Unity detects a QR code and finishes the calibration, it will post the qr_code_scanned message to react-native. The unity.js view handles that message by enabling the "Place Cube" button, which posts a place_button_click message from react-native to Unity.
All the pages are wrapped around _layout.js. In this example, we use _layout.js to wrap all the pages with <UnityProvider> from providers/unityprovider.js, which essentially means that the Unity view is always active in the background. Your app might prefer a different scenario; for example, you might want to initialize the Unity view only when a certain react-native page is opened. In that case, you'd remove the <UnityProvider> from _layout.js and wrap only that specific page with it.
assets
These are the icons and the splash image assets of your React Native project.
providers
The unityprovider.js script uses UnityView from @azesmway/react-native-unity to show a full screen embedded Unity view, and EventEmitter from utils/EventEmitter.ts to implement a simple mechanism to send and receive events between Unity and react-native.
unity
The unity/builds/ios folder contains the UnityFramework.framework that contains the embedded Unity AR project. You don't need to put the full Unity-iPhone project here, only the UnityFramework.framework that you'll build.
utils
The EventEmitter.ts is a simple TypeScript class for publishing and subscribing to messages.
Bridging Unity and React Native
In this example, we use a simple ReactNativeBridge.cs script to subscribe to and push messages on the Unity side.
You can add write a more complex logic for handling messages; just make sure that the GameObject name to which the script is attached and the method name match what's called from the React Native side.
using System;
using System.Collections;
using System.Collections.Generic;
using System.Runtime.InteropServices;
using UnityEngine.UI;
using UnityEngine;

public class NativeAPI
{
#if UNITY_IOS && !UNITY_EDITOR
  [DllImport("__Internal")]
  public static extern void sendMessageToMobileApp(string message);
#endif
}

public class ReactNativeBridge : MonoBehaviour
{
    public event Action<string> OnMessageFromReact;

    public void QrScanned()
    {
        if (Application.platform == RuntimePlatform.Android)
        {
            using (AndroidJavaClass jc =
                   new AndroidJavaClass("com.azesmwayreactnativeunity.ReactNativeUnityViewManager"))
            {
                jc.CallStatic("sendMessageToMobileApp", "qr_code_scanned");
            }
        }
        else if (Application.platform == RuntimePlatform.IPhonePlayer)
        {
#if UNITY_IOS && !UNITY_EDITOR
      NativeAPI.sendMessageToMobileApp("qr_code_scanned");
#endif
        }
    }

    public void MessageFromReact(string message)
    {
        OnMessageFromReact?.Invoke(message);
    }
}
Before you begin
There are a few things you need to do before getting started with this project:
- Set up your development environment by following the steps in the Quickstart.
- Create and set up a domain in a physical location.
- Download the React Native project.
- Download the Unity component of this project (
tutorial/posemesh-react-nativebranch) and replaceYOUR_APP_KEYandYOUR_APP_SECRETinAssets/Scripts/PersistentARinDomain.cswith your own credentials.
Build and run the project
1. Build the UnityFramework
Follow steps 2-3 from this tutorial to prepare and build the Unity project as a framework. The resulting UnityFramework.framework file can be copied to the unity/builds/ios folder.
2. Generate and configure the Xcode workspace
First run:
npm install
Then:
npm run ios
This will generate the React Native Xcode workspace but will fail to run first time because we are still missing the Unity related components. Run the following command to install the necessary cocoa pods:
rm -rf ios/Pods && rm -f ios/Podfile.lock && npx pod-install
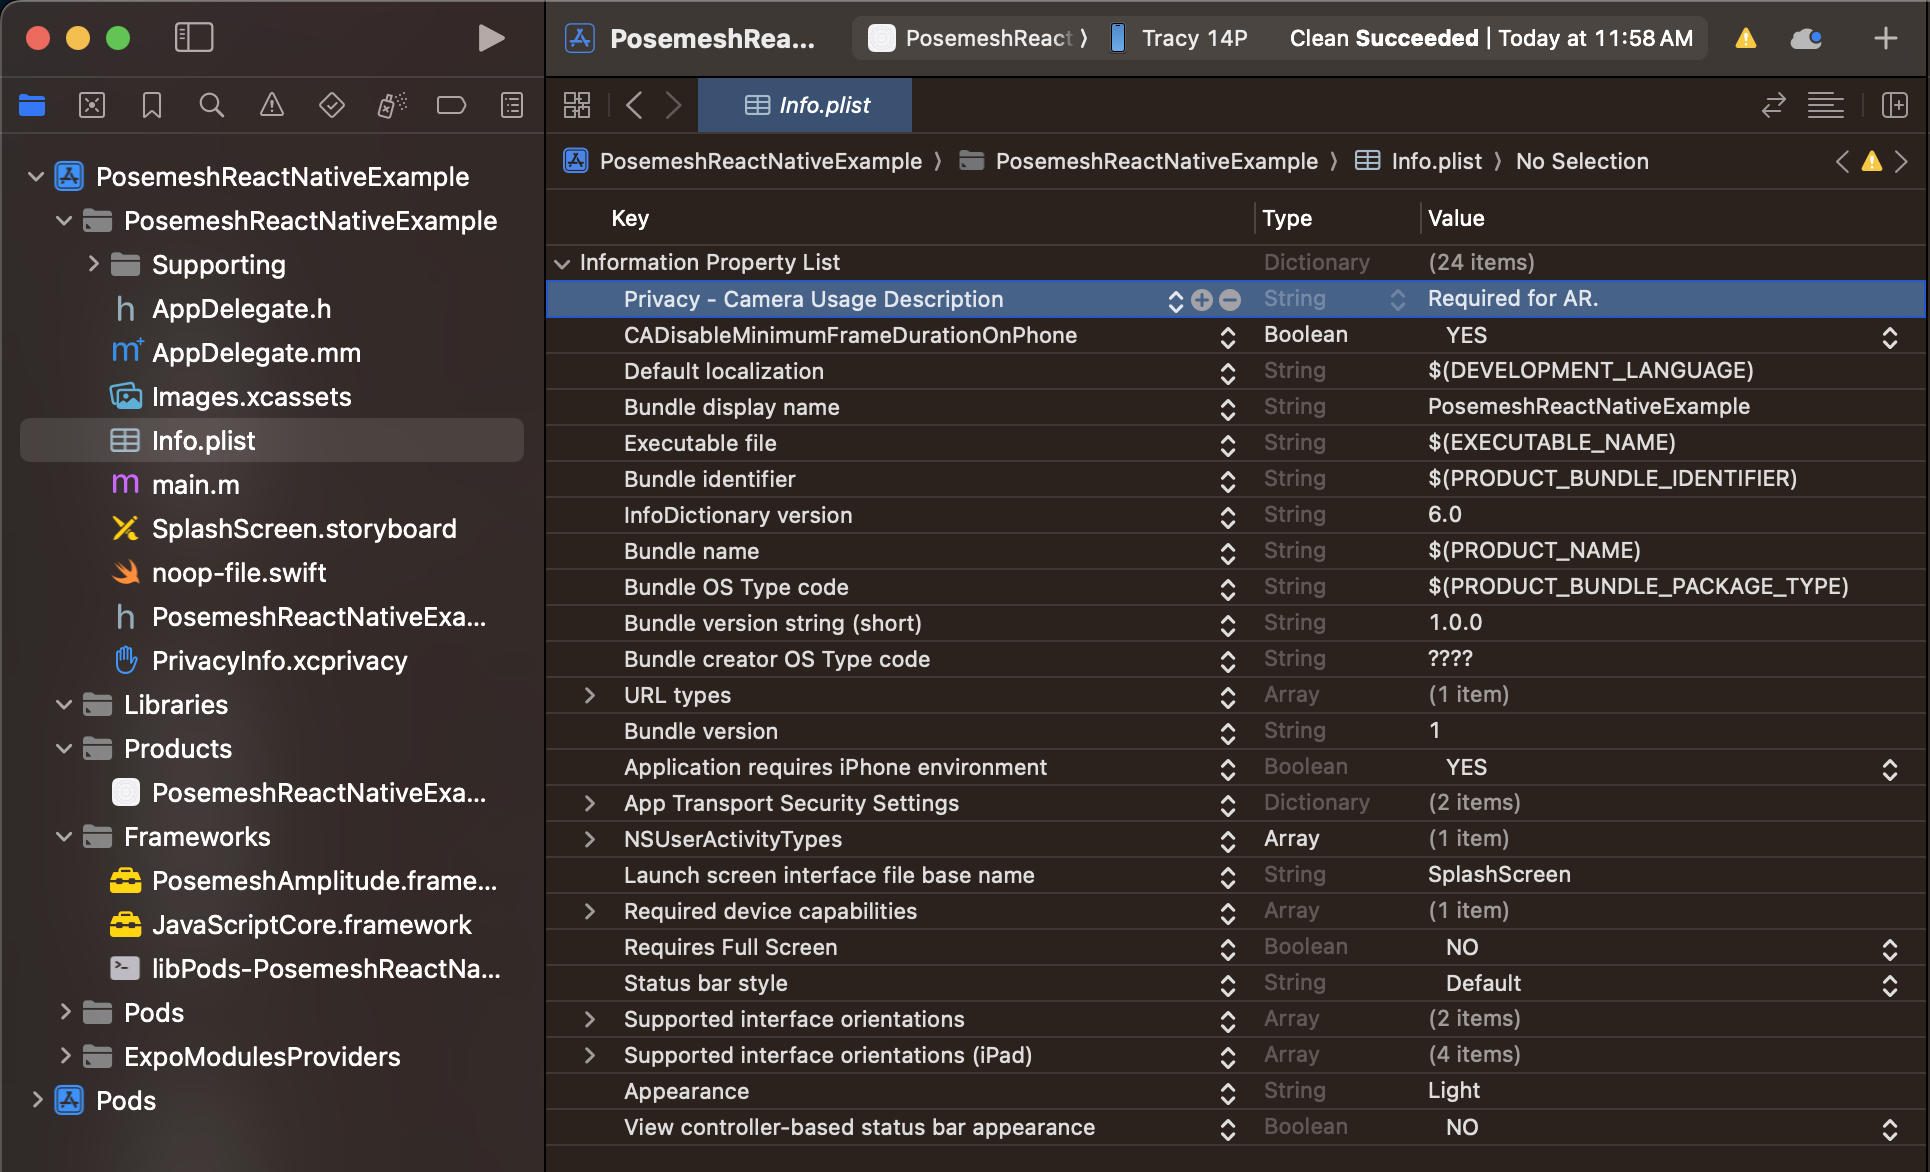
Open the generated .xcworkspace project in Xcode, open Info.plist, and add a new property Privacy - Camera Usage Description (or paste in the string NSCameraUsageDescription); this is required in order to ask for permission to use the camera for AR.

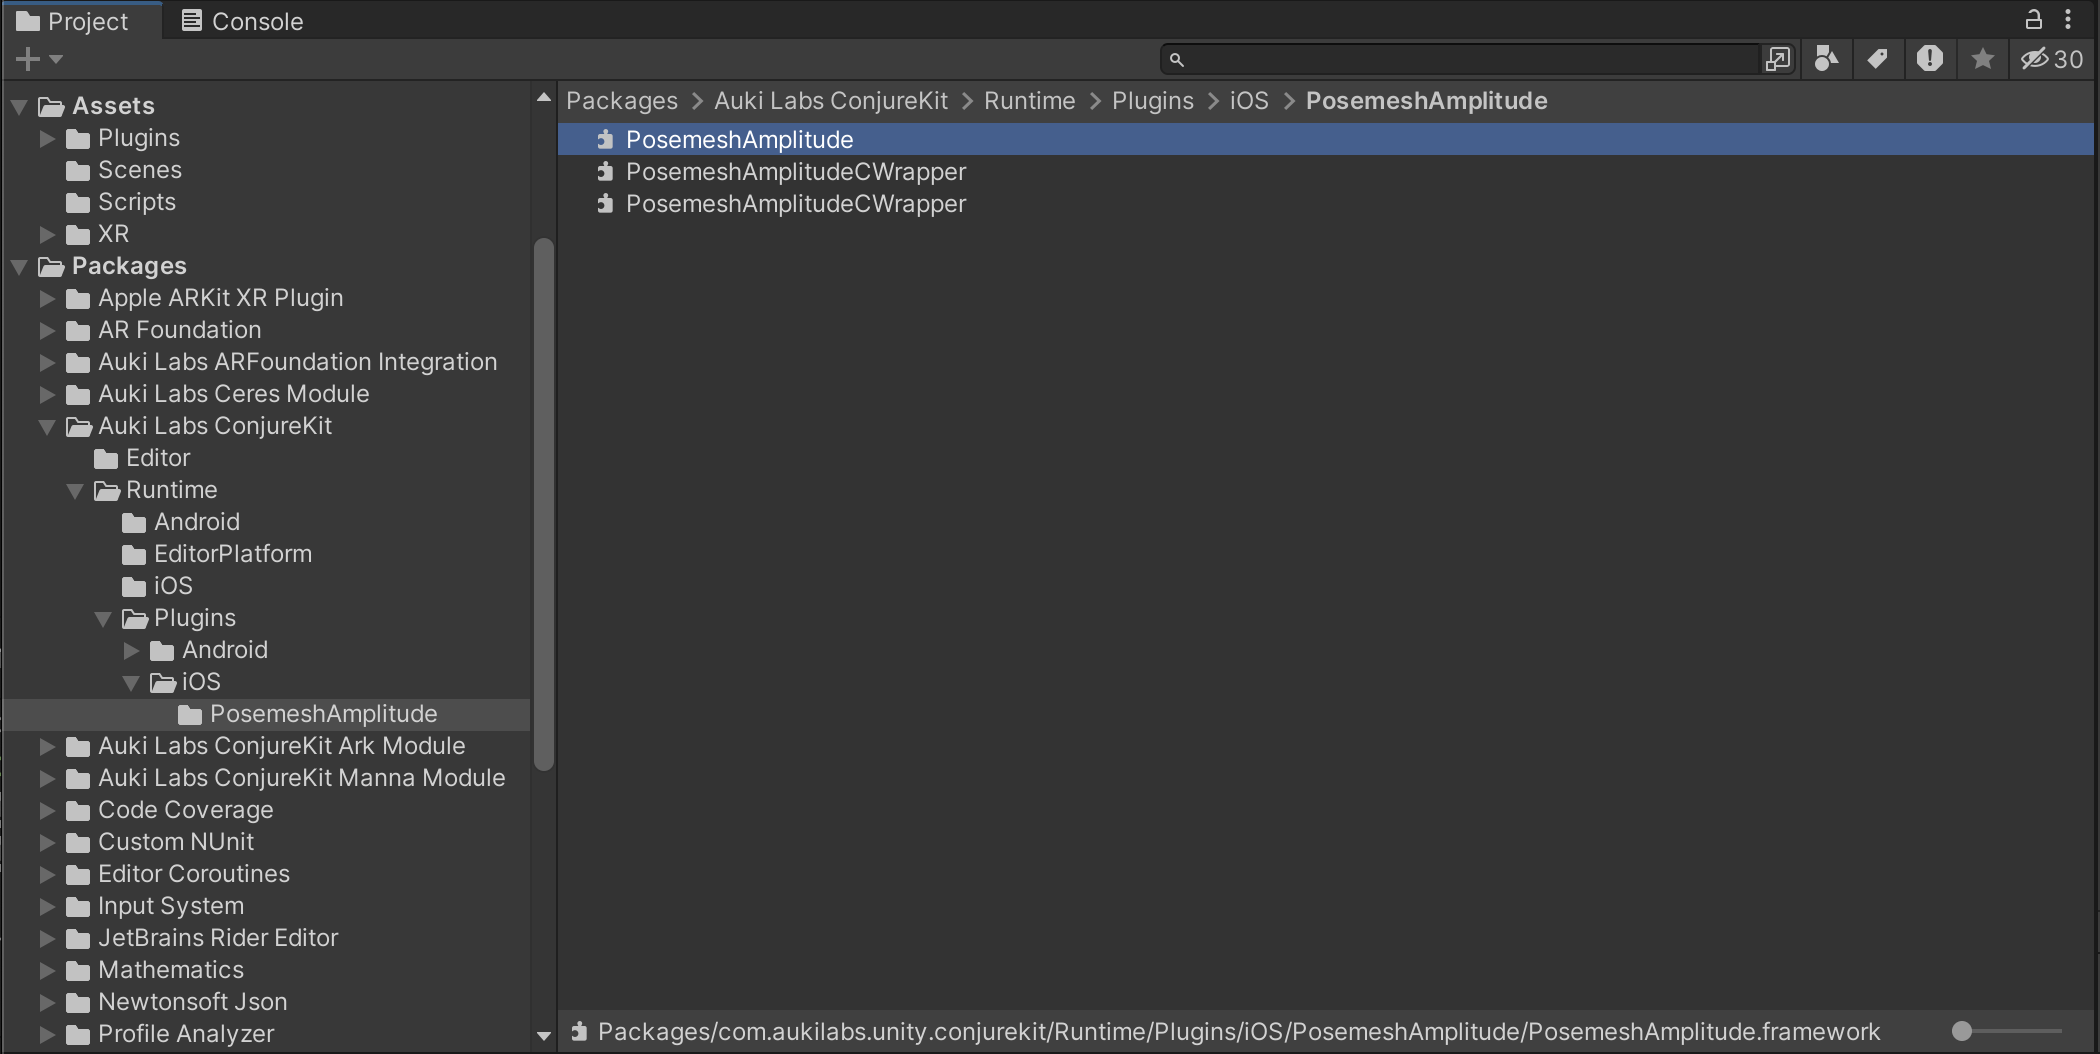
In your Unity project's Packages directory, find the Auki Labs ConjureKit/Runtime/Plugins/iOS/PosemeshAmplitude/PosemeshAmplitude.framework file.

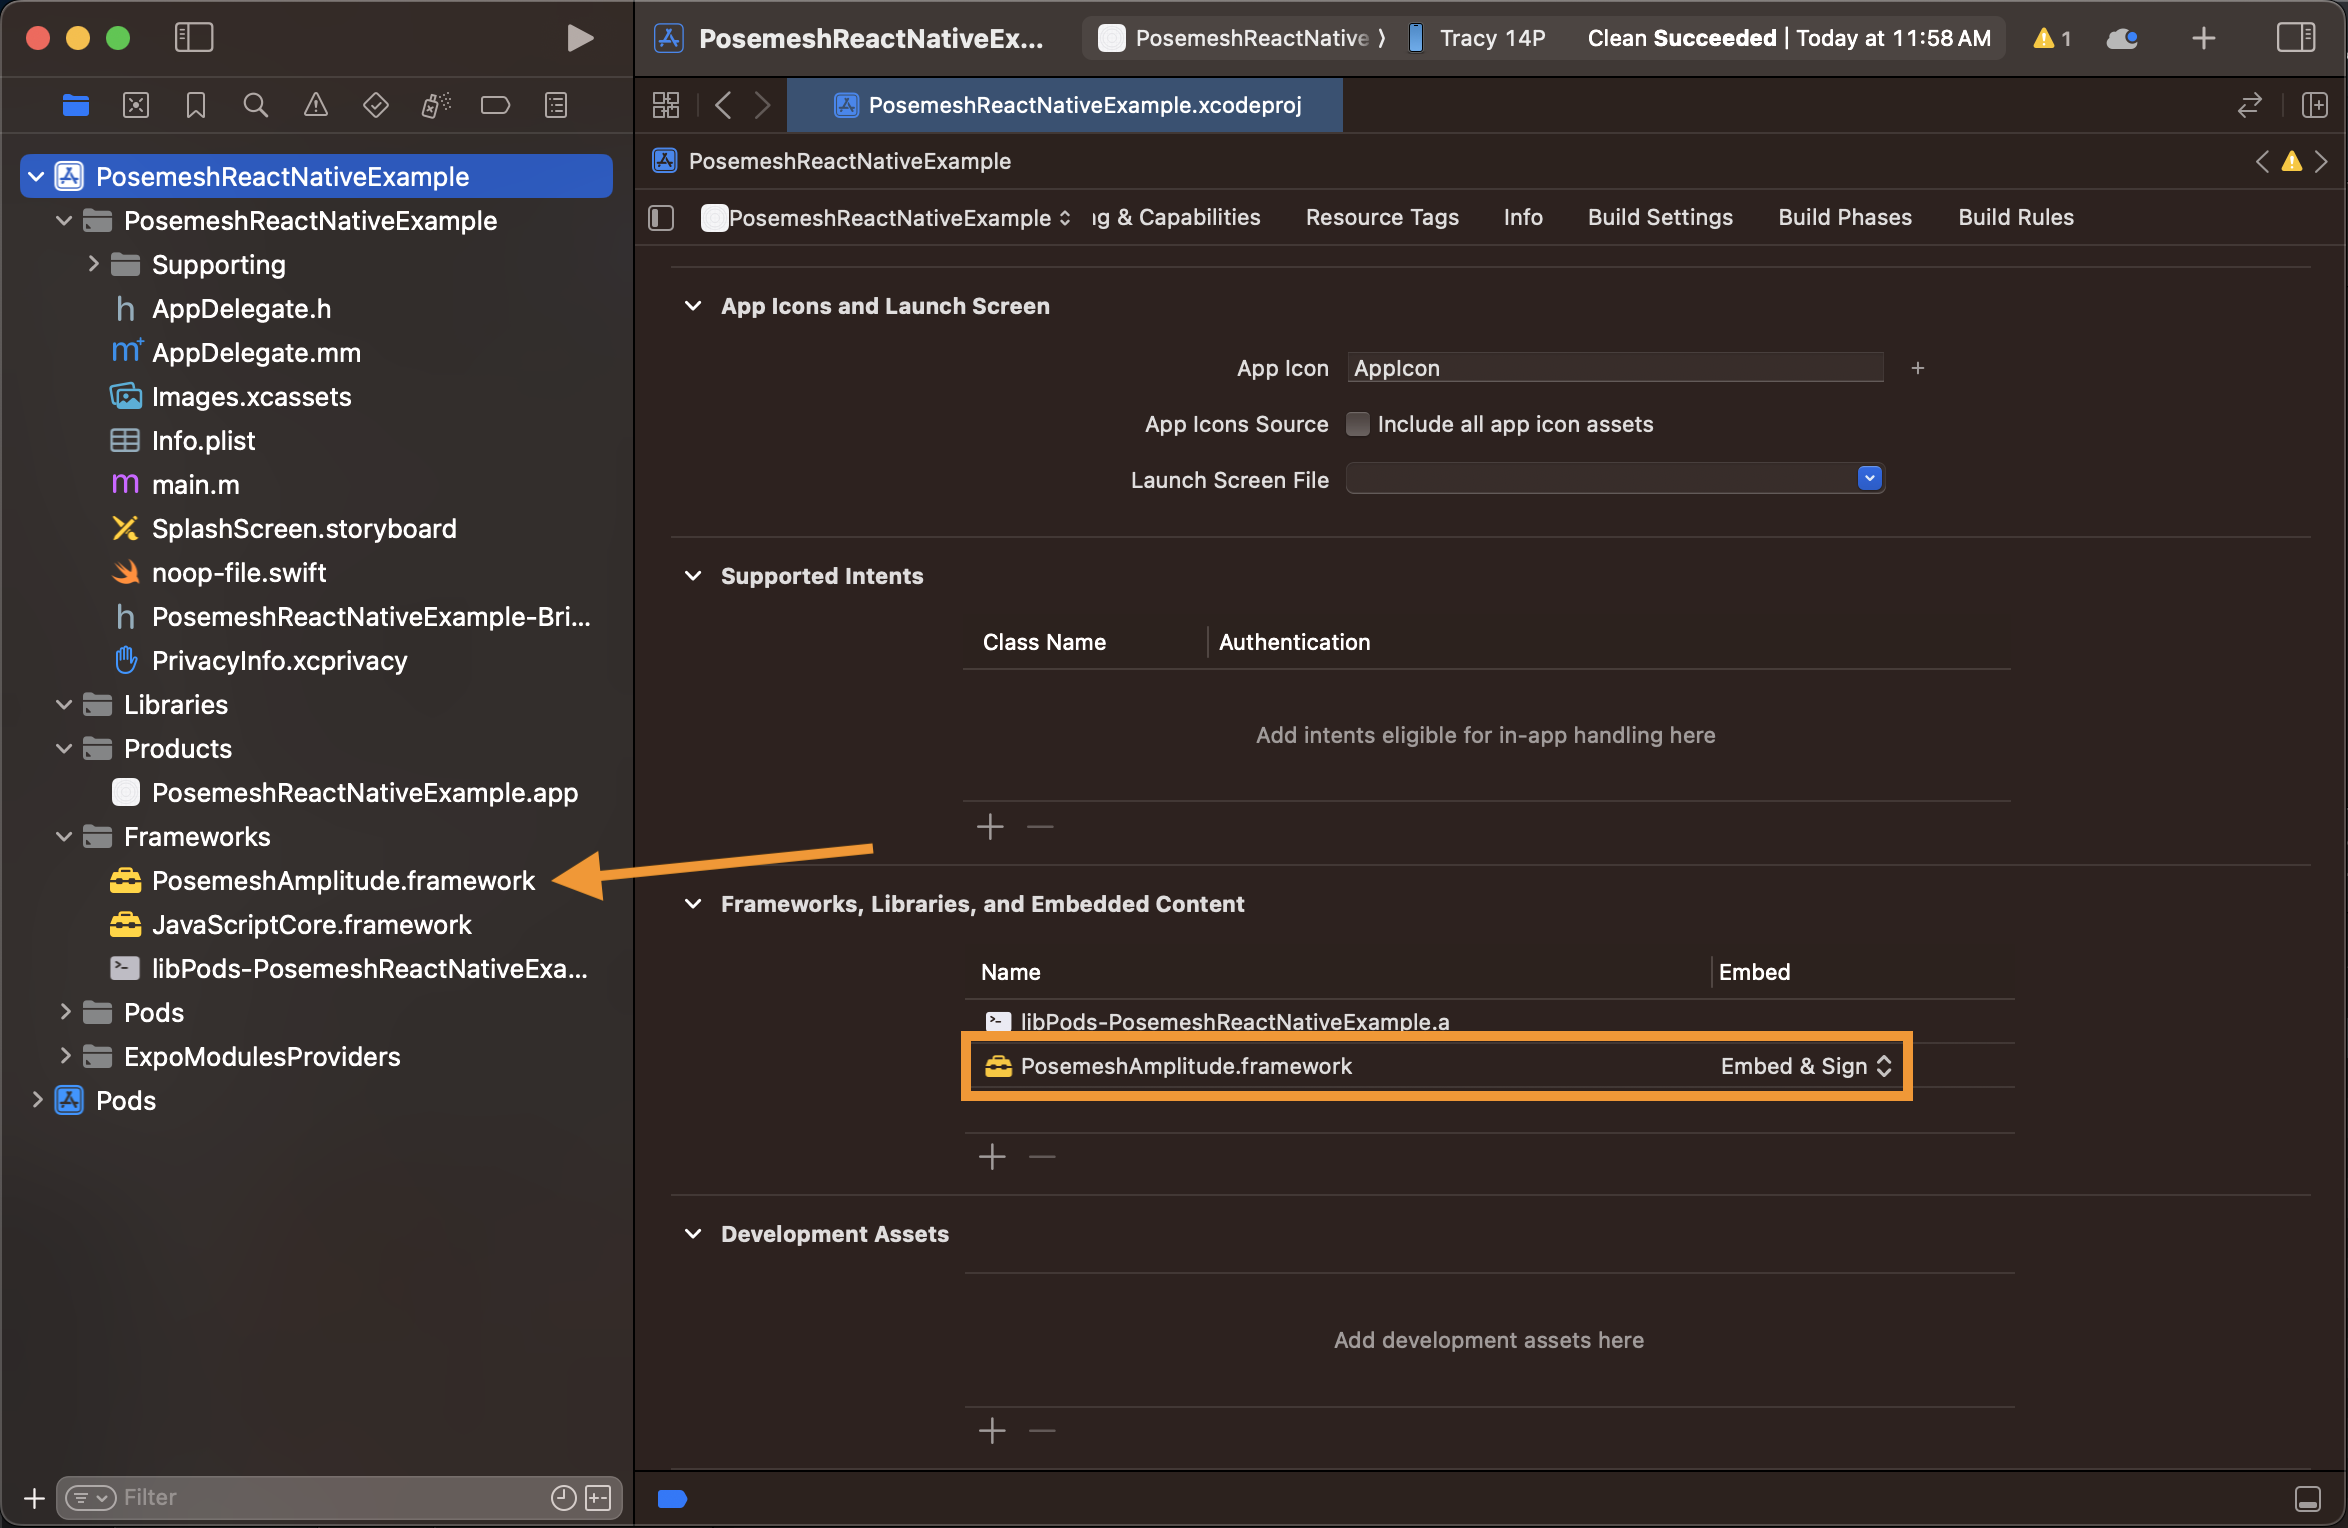
Drag PosemeshAmplitude.framework into the Frameworks folder in Xcode's Project navigator view. Then in the project's general settings (open by clicking the project name at the top of the navigator), scroll down to the Frameworks, Libraries, and Embedded Content section and set the PosemeshAmplitude.framework embed mode to Embed & Sign. Make sure you have properly configured the Signing & Capabilities settings too.

Clean the Xcode project by going to Product->Clean Build Folder.
3. Run the app
To run the project on a connected device, run the following command and follow the instructions in the terminal.
npm run ios
4. Implement your own app logic
Depending on your React Native app logic you will probably want to modify the files in the providers and utils folders to handle more complex communication between the Unity and React Native layers. If you have an existing React Native project you would need to partially or fully copy these folders to your project, install the @azesmway/react-native-unity dependency, and display the Unity view wherever appropriate.
To add your own Unity project, build it as a framework and replace UnityFramework.framework in the unity/builds/ios folder with it.
Known limitations
If the Unity view has a React Native overlay, the tap event might not get through the React Native layer to Unity. For this you might need to have all the UI on either the React Native side or on the Unity side when displaying the AR view.